Cold plunge for beginners: a science-backed 30-day protocol
A week-by-week ramp from cold shower to 52°F full immersion. Covers the cold shock response, breathing techniques, what to expect at day 30, and the one mistake that causes most beginners to quit.
Most people who try cold plunging quit within the first two weeks. Not because the practice doesn't work — the evidence for cold water immersion is solid — but because they skip a step that makes the whole thing survivable.
They go straight to a tub of 50°F water without first training the nervous system response that makes that temperature manageable.
The cold shock response is involuntary. First contact with cold water triggers gasping, rapid shallow breathing, and a spike in heart rate that can reach 20–30 beats above resting in under five seconds. If you haven't experienced and practised through this response before you get into a cold plunge, your body treats it as an emergency rather than a controlled stimulus. Sessions are miserable, duration is cut short before you reach any benefit window, and most people conclude that cold plunging is simply not for them.
This protocol fixes that. It builds tolerance in the right sequence — nervous system first, then temperature, then duration — so that by day 30 you're doing proper evidence-based sessions rather than white-knuckling 45 seconds and calling it a win.
If you want to understand the full science behind temperature ranges, session lengths, and the Søberg Protocol minimum effective dose before starting, read our cold plunge dosing guide first. If you want to know which tub to buy, our best inflatable cold plunges 2026 guide covers every budget. This article assumes you already have access to cold water — even a bathtub or shower — and are ready to start.
What you're actually training in the first two weeks
The cold shock response is mediated by the cutaneous cold receptors — thermoreceptors in the skin that detect rapid temperature drops and fire signals to the brainstem. The brainstem interprets this as a potential threat and activates the sympathetic nervous system: heart rate spikes, breathing becomes erratic, blood is shunted from extremities to the core.
This is not a character flaw or a sign of weakness. It's a hardwired protective mechanism that applies equally to experienced athletes and complete beginners on first contact with cold water.
What you're training in the first phase of this protocol is not cold tolerance per se — it's the ability to override the sympathetic response with controlled breathing, keeping the prefrontal cortex online rather than letting the brainstem run the session. Once you can do that reliably, the temperature and duration variables become manageable.
The practical implication: beginning with cold showers rather than full immersion is not taking the easy route. It's the correct training sequence. The cold shock response is proportional to the surface area of skin exposed to cold simultaneously. A cold shower hits a large surface area gradually. Full immersion hits the entire body surface at once, producing a response roughly three times as intense as a shower at the same temperature. Train the response on a shower, and immersion becomes manageable.
The one mistake that causes most beginners to quit
Trying to beat the cold shock response through willpower rather than breathing technique.
Gritting your teeth and enduring the gasping and heart rate spike works once, maybe twice. It does not produce neural adaptation, and it makes every subsequent session feel just as bad as the first. It also creates a negative associative loop — your brain begins to anticipate the session with dread rather than neutrality, making it progressively harder to get in.
Breathing technique, by contrast, directly modulates the sympathetic response through the vagus nerve. Slow, controlled exhales activate the parasympathetic system, counteracting the brainstem's alarm signal in real time. Once this is a trained reflex — once your response to cold contact is to exhale slowly rather than gasp — sessions become tolerable within 15–20 seconds of entry rather than remaining miserable for the entire duration.
This is the skill the first two weeks of this protocol are designed to build. Everything else follows from it.
The breathing technique
Before you start the protocol, practise this outside of cold exposure so it becomes automatic.
Box breathing with extended exhale:
Inhale slowly for four counts. Hold for two counts. Exhale slowly for six to eight counts. Hold for two counts. Repeat.
The extended exhale is the active ingredient. Exhalation activates the vagus nerve and triggers parasympathetic tone — the physiological opposite of the sympathetic alarm state. The ratio matters more than the specific counts: exhale should be longer than inhale.
When you enter cold water and feel the urge to gasp, your job is to redirect that gasp into a slow exhale instead. This is the entire skill. It sounds simple. It is not easy the first several times. It becomes automatic by week two with daily practice.
Where to practise: Try it anywhere — in a chair, lying in bed, before a regular shower. The point is to automate the exhale-first response so it fires reflexively under cold stress.
What you need before day 1
You do not need a specialty tub to begin this protocol. Weeks one and two use a shower, which you already have.
For weeks three and four you will need access to cold water at roughly 55–60°F. In most climates, cold tap water in a bathtub reaches this range naturally. If your tap water runs warmer than 60°F, add ice to bring the temperature down — a $15 bag of ice from a petrol station is sufficient for a bathtub fill.
By week five and beyond — which takes you into your ongoing protocol after day 30 — a dedicated inflatable cold plunge tub makes the practice significantly more consistent and easier to maintain. See our buying guide for tub options at every price point.
Useful from day one:
- Waterproof digital thermometer (~$15) — you need to know your actual water temperature, not estimate it
- A timer you can see or hear without looking at it
- A towel within arm's reach of the tub
Not required but worth having:
- Flip-flops or non-slip mat — cold feet on a hard floor after exiting increases fall risk
- A lightweight robe — useful for the post-plunge rewarming period without rushing into a hot shower
The 30-day protocol
Week 1 — cold shower adaptation (days 1–7)
Goal: Train the cold shock response and automate the breathing technique. No immersion yet.
Session structure: Take your normal shower. At the end, turn the water to cold and stand under it for 30 seconds. Focus entirely on the breathing technique — slow exhale on first contact, then box breathing with extended exhale for the duration. Do this every day.
What to expect: Day one will feel rough. The gasping urge will be strong. By day three, you will notice the transition from gasping to controlled breathing happening faster. By day seven, most people can control breathing within five to ten seconds of cold water contact. That's the adaptation you're looking for.
Temperature target: As cold as your shower gets — typically 55–65°F. Do not worry about precision here.
Duration: 30 seconds, no more. The goal is nervous system training, not cold exposure volume. A 30-second session where you maintained controlled breathing the entire time is a success. A three-minute session where you gasped and tensed throughout is not.
Common mistake this week: Ending the shower cold to "toughen up" without applying the breathing technique. Endurance without technique produces habituation to suffering, not physiological adaptation. Apply the breathing deliberately on every exposure.
Week 2 — extended shower, introduce immersion (days 8–14)
Goal: Extend cold shower duration and take your first full immersion session.
Days 8–11 — shower sessions: Increase cold shower duration to 60–90 seconds. Add a deliberate focus on relaxing the shoulders and jaw during the cold phase — muscular tension under cold stress is a sympathetic indicator. If you can relax the face and shoulders while maintaining controlled breathing, you've achieved genuine parasympathetic override rather than just enduring.
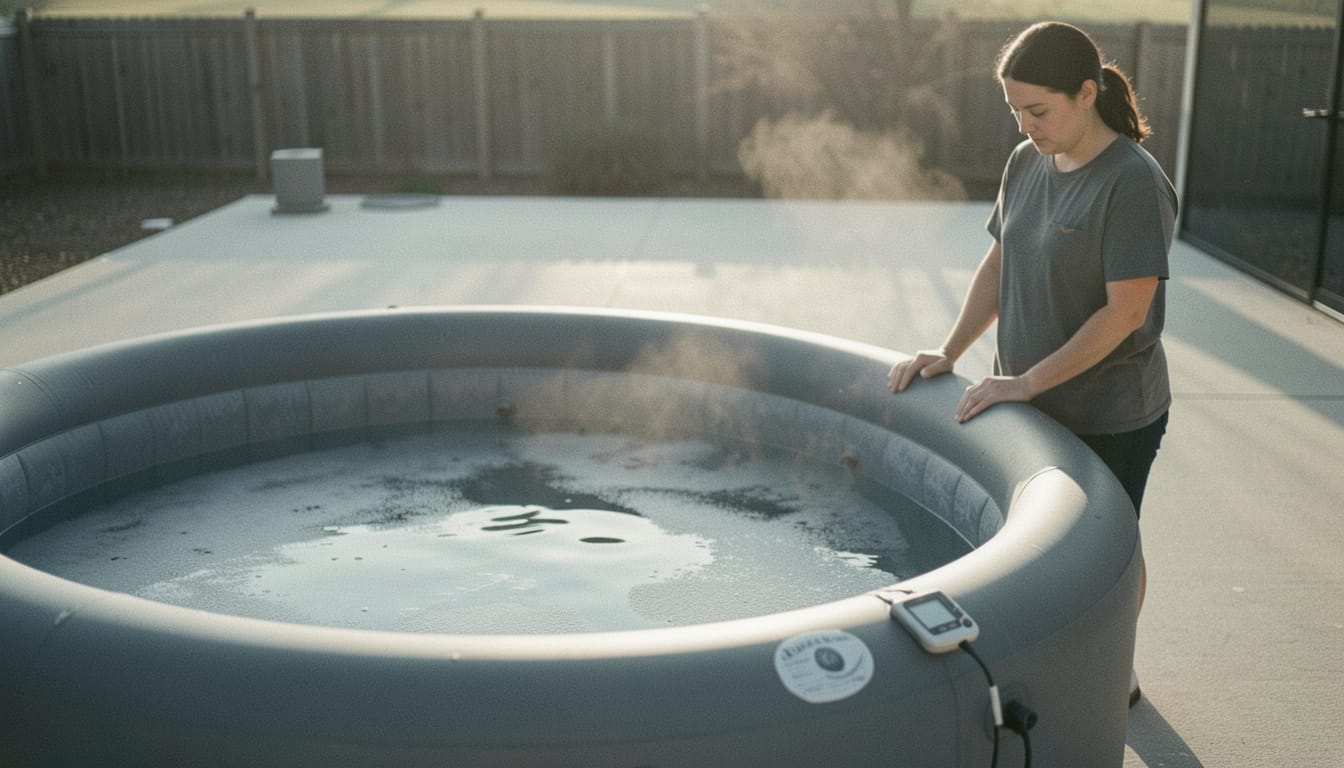
Days 12–14 — first immersion sessions: Fill a bathtub or use your cold plunge tub. Target temperature: 58–62°F. If using a standard bathtub, measure water temperature with your thermometer — cold tap water temperature varies significantly by region and season.
Session structure: Enter slowly. Sit or stand, submerged to the waist minimum. Apply the breathing technique immediately on entry — this is different from a shower because full immersion triggers a more intense cold shock response. Expect it to feel considerably harder than the shower sessions. That is normal and expected.
Duration: 1–2 minutes. Exit if breathing becomes uncontrollable or you feel dizzy. The target is controlled breathing for the full session, not maximum duration.
What to expect: The first immersion session is a reset. Most people find it harder than their day-seven shower and feel temporarily discouraged. This is the surface area effect described earlier — it passes quickly with practice. By the third immersion session, the response is typically much more manageable.
Week 3 — temperature drop and duration increase (days 15–21)
Goal: Reach 55°F and extend sessions to two to three minutes.
Drop your target temperature by 2–3°F from the previous week. If you were at 60°F, target 57°F. Add ice if needed to reach this.
Session structure: 3–4 sessions this week. Rest days between sessions are fine and recommended while you're adapting.
- Enter using the breathing technique.
- Aim for 2 minutes at temperature. If you reach 2 minutes with controlled breathing, stay for up to 3 minutes.
- Begin practising the post-plunge rewarming behaviour: exit, towel lightly, resist the urge to run to a hot shower for at least 10–15 minutes. The shivering and warmth-seeking you feel is brown fat thermogenesis activating — it is the beneficial response, not a problem to solve.
What to expect: Week three is typically when sessions begin to feel genuinely tolerable rather than merely survivable. The breathing technique is starting to automate. The cold shock response on entry is faster to resolve. Many people notice the post-plunge mood elevation clearly for the first time this week — the norepinephrine and dopamine response becomes perceptible once sessions are long enough and cold enough to trigger it fully.
Troubleshooting: If you are still gasping uncontrollably beyond the 30-second mark at 57°F, go back to 60°F for another week. Do not chase lower temperatures until breathing is under control at the current temperature. Temperature and duration goals are meaningless if the nervous system response isn't managed.
Pros
- +By day 21 most people are doing 2–3 minute sessions at 57°F with controlled breathing throughout
- +The post-plunge dopamine and norepinephrine effects are now clearly perceptible — motivation to continue rises sharply
- +3–4 sessions per week is sustainable without excessive recovery cost
Cons
- −Bathtub immersion requires water changes between sessions — more logistically demanding than a dedicated tub
- −Temperature consistency is difficult without a chiller — water warms between fills
- −The shivering phase after exiting is uncomfortable; most beginners still fight the urge to hot shower too early
Verdict: Week 3 is when most people either commit to the practice or quit. The mood benefits are real but only noticeable after proper sessions. Push through to day 21.
Week 4 — reaching therapeutic temperature (days 22–30)
Goal: Reach 52–55°F and establish the Søberg Protocol minimum effective dose.
Target: 52–55°F, 3 minutes per session, 3–4 sessions per week.
This is your destination protocol — the one you'll maintain beyond day 30. At 52–55°F for three minutes, three to four times per week, you're delivering approximately 9–12 minutes of weekly cold exposure, which meets the Søberg Protocol minimum effective dose for metabolic adaptation.
Session structure: Enter, apply breathing technique, settle into the cold within 15–20 seconds (this should now be achievable from the previous three weeks of practice). Hold for three minutes. Exit and rewarm naturally for 15 minutes before any hot shower.
Mental targets at day 30:
- Entry to controlled breathing: under 20 seconds
- Session duration at 52–55°F: 3 minutes, comfortably
- Post-session mood lift: clearly noticeable within 20–30 minutes
- Dread before sessions: minimal to absent
Most people at day 30 describe the anticipation as the hardest part — the session itself has become neutral to mildly pleasant once the first 20 seconds pass.
What changes after day 30
Day 30 is not a finish line — it's the point at which you have the tools to follow an evidence-based maintenance protocol independently.
From here, the question is what you want to optimise for. Three main directions:
Continue with the Søberg Protocol (3–4 sessions/week, 3 minutes, 52–55°F) — this is sufficient for the metabolic, immune, and mood benefits described in the research. Most people who continue indefinitely stay close to this protocol.
Lower the temperature gradually — experienced practitioners often work down to 45–50°F over several months. The physiological adaptation continues; each new temperature floor requires a short re-adaptation period. Follow the same logic as this protocol: control breathing at the new temperature before extending duration.
Combine with heat — sauna and cold plunge contrast therapy is a natural progression, with evidence for cardiovascular adaptations that exceed either modality alone. Our contrast therapy protocol article covers the research and sequencing. This becomes available once cold exposure is an established habit rather than a work-in-progress.
Who should not cold plunge
Cold water immersion is contraindicated without medical clearance for people with:
- Cardiovascular disease or a history of heart attack
- Arrhythmias, including atrial fibrillation
- Uncontrolled hypertension
- Raynaud's phenomenon or other conditions affecting peripheral circulation
- Peripheral neuropathy or reduced sensation in the extremities
- Uncontrolled diabetes
- Pregnancy
If you are on medications that affect heart rate, blood pressure, or circulation, consult your doctor before starting. This is not a precautionary boilerplate — cold water immersion produces rapid, significant cardiovascular responses, and these conditions change the risk profile meaningfully.
For everyone else: start with week one of this protocol, not with a 50°F plunge.
Tub options for when you're ready
After completing this protocol, most people want a dedicated tub rather than continuing to fill a bathtub with ice. The logistics are simply too friction-heavy for a practice that benefits from consistency.
For beginners who want to start with a purpose-built tub from day one rather than a bathtub:
The Cold Pod — 85 gallon inflatable ice bath
~$90–$130
The most widely recommended entry-level inflatable cold plunge. Quadruple-layered insulation keeps water cold longer than basic inflatables. Includes insulated lid. Ice-only setup — no chiller required. Fits up to 6'4".
- ✓Under $130 — low commitment for a practice you're still testing
- ✓Insulated walls maintain temperature better than a standard bathtub
- ✓Quick to set up and drain between sessions
For practitioners completing this protocol who want to graduate to chiller-based temperature control — which removes the ice logistics and lets you dial in 52°F precisely — see our full inflatable cold plunge buying guide for chiller-compatible options at the under-$500 and under-$1,000 tiers.
Day-by-day summary
| Days | Temperature | Duration | Sessions | Primary goal |
|---|---|---|---|---|
| 1–7 | Shower cold | 30 sec | Daily | Breathing technique |
| 8–11 | Shower cold | 60–90 sec | Daily | Extend + relax |
| 12–14 | 58–62°F immersion | 1–2 min | 3 sessions | First immersion |
| 15–21 | 55–58°F | 2–3 min | 3–4 sessions | Temperature drop |
| 22–30 | 52–55°F | 3 min | 3–4 sessions | Søberg Protocol dose |
The breathing technique is the only thing that matters in week one. Everything else builds on it.
As an Amazon Associate, LongevityGearLab earns from qualifying purchases. Prices and availability are accurate as of the date published and may change.